Thursday 15 November 2018

SDL Tridion Sites 9 New Feature - GraphQL

The New SDL Tridion sites 9 Content API uses GraphQL. GraphQL is a data fetching and Query Language for APIs. It was created by Facebook in 2012 and was open sourced in 2015.

Advantages of GraphQL
  1. Instead of making multiple endpoints call in REST version here in the just single endpoint we can get the data(JSON).
  2. Documentation is available online [click]
  3. Online Community support [click]
GraphQL can be used with multiple deceives, like Facebook developed this to power their mobile application.GraphQL can be used in any application, web application or mobile app many different programming languages support GraphQL [learn more].

So, let get back to the content API, when you install the content API you will see a new endpoint.
content API
Now, let run some query to get the data but first, we need to install GraphQL client tool, I have GraphiQL installed [download]

Let's run some sample queries.

Page content
Page
Component Presentation
Component Presentation 
Publication
Publication

To learn more, how to structure GraphQL queries the documentation about GraphQL query is available on SDL docs site you can refer that.[link]

Happy coding and keep sharing !!!

SDL Tridion Sites 9 with DXA 2.0 on Windows 10

On Wednesday 7th NOV, SDL Announces the new release SDL Tridion Sites 9 and I got this opportunity to explore this new version and today we are going to install the SDL Tridion 9 on Windows 10 (Not Recommended/supported by SDL though).

The first Step is Install Database by running the PowerShell scripts. I have MSSQL Server 2016 SP2 Developer Edition installed on my local machine and the following DBs are installed.


Next is run the SDLTridionSites9.exe installer but this time from the command line.

Once the step is finished successfully you would able to browse the SDL Tridion Sites 9.
SDL Tridion Sites 9

Next Step is Installed the Content Delivery Microservice and for that go to the installation media folder and navigate to \Content Delivery\resources\quickinstall

First, we need to update the setenv.ps1 and after the run the quickinstall.ps1 
setenv

After the quickinstall.ps1 stop executing go and check the windows services to confirm the service are installed properly and they are running as well.
Microservice
and last the discovery-registration.jar to update the capabilities.

So we finally able to install SDL Tridion Sites 9 and all Microservice on Windows 10 but we also need to updte the Topology Manager to be able to start Publishing and for that, we need to open PowerShell in Administrator mode and run the following command in the sequence.


 > Add-TtmCdTopologyType -Id "TOPOLOGYTYPEID" -Name "TOPOLOGYTYPENAME" -EnvironmentPurposes “PURPOSES”  
 > Add-TtmCdEnvironment -Id "CDENVIRONMENTID" -EnvironmentPurpose "CDENVIRONMENTPURPOSE" -DiscoveryEndpointUrl "DISCOVERYENDPOINTURL"   
 > Add-TtmCdTopology -Id "TOPOLOGYID" -Name "TOPOLOGYNAME" -CdTopologyTypeId "TOPOLOGYTYPEID" -CdEnvironmentIds "CDENVIRONMENTIDS"  
 > Add-TtmWebsite -Id "WEBSITEID" -CdEnvironmentId "CDENVIRONMENTID" -BaseUrls “BASEURLS”  

Once that is done you can create a dummy publication create BPT map that BPT with Topology Type, create SG and page and test publishing.

I've installed the latest DXA CMS import, Downloaded the DXA .NET Framework and we also need DXA-Model-Service from SDL official GitHub, after some tweak in the code I was able to run the DXA web application.
DXA CMS import

DXA WEB Application 


Happy coding and Keep Sharing !!!


Saturday 10 November 2018

SDL Tridion Sites 9


SDL Tridion DX combines the strengths of SDL Tridion Sites 9 web content management, SDL Tridion Docs, and SDL Language services.

New Features in SDL Tridion Sites 9

  1. Headless Customer Experience 
  2. Dynamic content mashups with taxonomies
  3. Experience optimization 
  4. Regions for easy management of content-rich web pages
  5. Quick and easy image editing
  6. GraphQL-based content service
  7. Docker container support for flexible deployment
  8. SAML 2.0 support for single sign-on
  9. Alibaba Cloud support for websites in China
  10. Staged and rolling scenarios for smoother upgrades

Upgrade to SDL Tridion Sites 9


Upgrading to Sites 9 is easier to upgrade and it reduces risk and costs with zero downtime. The upgrade is available from Tridion 2013 SP1 HR2 and up.


Pre-Requisites for SDL Tridion Sites 9 CM and CD side
  1. Content Manager supports Microsoft Windows server 2016 x64, .NET Framework 4.7.2, Java 8. IIS 10
  2. The Content Delivery side is also known as UDP (Unified Delivery Platform) requires Windows server 2016, Linux/RHEL 6.9 and 7.4, .NET Framework 4.7.2 and Java 8.
  3. Both CM and CD databases support SQL Server Azure, Amazon RDS, MS SQL Server 2016 SP1 / 2017

Stay tuned for more updates on Tridion 9 !!!

Thursday 8 November 2018

Configure Workers, ActiveMQ and Redis for Scalable Deployment in SDL WEB 8.5

This is in continuation of my previous blogs where we discussed how to install CM and publisher on a dedicated machine and then, we saw how we can implement scale out content deployment using workers, ActiveMQ and Redis. Today, we are going to see how to configure Workes, ActiveMQ and Redis.

To read more about last two blogs in this series:-
  1. Scaling SDL WEB 8.5 Installing CM and Publisher on Dedicated Machines
  2. Scaling Deployers in SDL WEB 8.5
In order to configure the scalable content deployment, we need Deployer(Endpoint) and Deployer-Worker.

Deployer Installation Media
Pre-requisites, we need to install ActiveMQ and Redis
  1. How to install Redis please check my previous blogs.
  2. Download the Apache ActiveMQ
    1. Unzip the package in a suitable location and from command line execute command activemq start.
    2. Open your browser and navigate to the Admin Console at http://localhost:8161

Next step is to configure Deployer-Endpoint and Deployer-Workers Microservices.
  1. Both these services are required to update the deployer_conf.xml and Deployer-Workers required cd_storage_conf.xml.
  2. In the Deployer-Endpoint installation media open deployer_conf.xml.
    1. Here we need to update the <BinaryStorage> node and point this to Redis data store.
      Configure Redis in Deployer-Endpoint
    2. we need to configure the <State> node. so that workers know where to update the status of a job and the endpoint knows from where to get the status of the job.
      Configure State
    3. Next, is we need to configure ActiveMQ, we also need to make sure that all the other <Queue> entries related to FileSystem are commented out.
      Configure Apache ActiveMQ JMS
    4. Save and close the deployer-conf.xml file and use this same file for Workers as well.
    5. Next step is to configure the cd_storage_conf.xml for Deployer-Workers only.
      1. Here we need to update the <Storage> node with the Broker Database details. The worker will deploy the content on this DB.
      2. Update the License file path.
      3. Save and close the file and we can use this same file on the second Deployer-Worker.
    6. Now, we need to configure the ports for Deployer-Endpoint and Deployer-Workers.
    7. Last run the installService.ps1 from the Deployer-Endpoint folder and from Deployer-Worker. You need to run the command more than once depending upon the number of Deployer-Workers you want.
      Deployer-Endpoint and Deployer-Workers are installed  
    8. We have all the services configure and up-running.
    9. The final step is to register your Deployer (Endpoint) with your Discovery Service and run the discovery-registration.jar.


Happy Coding and Keep Sharing


Sunday 4 November 2018

Scaling Deployers in SDL WEB 8.5

This is in continuation of my previous post where we discussed how to set up Publisher and CM on a dedicated machine to improve the publishing efficiency click here to Read More.

Today we are going to see how to scale out Deployers, using multiple deployers and workers.

High-Level Achrciture diagram 

Steps:

  1. Content is passed to the Deployer after a user Publishes an item in the CME.
  2. The Deployer Endpoint passes the Transport Package (.zip file) to the defined Binary Storage (File System or Redis Database). We are using Redis right now.
  3. The Deployer Endpoint also passes the item to the Queue in ActiveMQ (JMS).
  4. ActiveMQ triggers an event that informs the Worker Deployers that a new package has been received.
  5. The first available Worker Deployer picks up the job from the Queue and contacts the Binary Storage to get the respective Transport Package.
  6. After rendering the Transport Package the Worker Deployer passes the item to the Broker Database.
  7. The Deployer then gets the status of the job from the Broker Database, which is updated by the Worker Deployer responsible for that job.
In the next blog, we'll see how to configure Workers, ActiveMQ and Redis.

Happy Coding and Keep Sharing 


Multiple Destination Publishing Using - MIRROR strategy in SDL WEB 8.5

What is Multiple Destination Publishing?


Multiple destination publishing means that the transport service can publish to multiple deployer destinations (if you have more than one deployer).

DEFAULT strategy means that there will be only one deployer only one URL is registered in discovery-service).

MIRROR strategy means that you can have more than one deployer (multiple URLs are registered in discovery-service) and transport service will send the package to all of the deployer URLs register in discovery service.

How to configure Multiple Destination Publishing?


We can do this by defining the strategy for the DeployerCapability which is registered in the Discovery Microservice cd_storage.conf.xml:

If you have set up multiple Content Deployer destinations, do the following in order to setup MIRROR strategy:

  1. Ensure that this Role element has a Strategy attribute, set to MIRROR.
  2. Inside the Role element, insert a Urls subsection, itself containing two or more Url subelements. Each Url element must have a Value attribute, set to the URL of the destination, and can have a DestinationName attribute, set to the name of this destination

Strategy Attribute 

This Role has one Capability URL (value DEFAULT, to be specified in the Url attribute) 
or multiple ones value MIRROR, to be specified in the URLs subsection. Defaults to DEFAULT is not specified.

Happy Coding and Keep Sharing !!!

Monday 10 September 2018

Published Summary Alchemy Plugin

In my previous blog, we saw how Published Summary plugin was conceptualized, its use cases and how it works and its different functionalities.

In this Plugin, I wrote the C# code that interacts with Core Service and forwards the JSON response to be consumed on FrontEnd.

Based on the use cases and feature of this plugin I wrote the Endpoints on the following scenarios and provided the JSON.
  1. Get All Published Items from Publication, Structure Group, and Folder.
    • Let's say if we select Publication then the response will be all Published  Pages, Components, and Categories in that publication.
    • If we select this plugin from Structure group, then we will have all the published pages in the structure group and same goes for Folder selection all Published ComponentTemplates and Components.
  2. Publish Items that are selected by the user from the Plugin UI.
  3. Unpublish the Items that are select by the user from the Plugin UI.
  4. Summary Panel, where we'll have a Snapshot of how many items are published in a particular publication, basically a GroupBy of itemsType with the count.
  5. And Finally,  Get all Publication and Target Type.
Now, Let's look at the code at High Level

Get All Published Item

The GetAllPublishedItems method is the POST request method and deserialized JSON in C# modal.

JSON format is {'IDs':['tcm:14-65-4']}

 [HttpPost, Route("GetAllPublishedItems")]  
     public object GetAllPublishedItems(TcmIds tcmIDs)  
     {  
       GetPublishedInfo getFinalPublishedInfo = new GetPublishedInfo();  
       var multipleListItems = new List<ListItems>();  
       XmlDocument doc = new XmlDocument();  
       try  
       {  
         foreach (var tcmId in tcmIDs.IDs)  
         {  
           TCM.TcmUri iTcmUri = new TCM.TcmUri(tcmId.ToString());  
           XElement listXml = null;  
           switch (iTcmUri.ItemType.ToString())  
           {  
             case CONSTANTS.PUBLICATION:  
               listXml = Client.GetListXml(tcmId.ToString(), new RepositoryItemsFilterData  
               {  
                 ItemTypes = new[] { ItemType.Component, ItemType.ComponentTemplate, ItemType.Category, ItemType.Page },  
                 Recursive = true,  
                 BaseColumns = ListBaseColumns.Extended  
               });  
               break;  
             case CONSTANTS.FOLDER:  
               listXml = Client.GetListXml(tcmId.ToString(), new OrganizationalItemItemsFilterData  
               {  
                 ItemTypes = new[] { ItemType.Component, ItemType.ComponentTemplate },  
                 Recursive = true,  
                 BaseColumns = ListBaseColumns.Extended  
               });  
               break;  
             case CONSTANTS.STRUCTUREGROUP:  
               listXml = Client.GetListXml(tcmId.ToString(), new OrganizationalItemItemsFilterData()  
               {  
                 ItemTypes = new[] { ItemType.Page },  
                 Recursive = true,  
                 BaseColumns = ListBaseColumns.Extended  
               });  
               break;  
             case CONSTANTS.CATEGORY:  
               listXml = Client.GetListXml(tcmId.ToString(), new RepositoryItemsFilterData  
               {  
                 ItemTypes = new[] { ItemType.Category },  
                 Recursive = true,  
                 BaseColumns = ListBaseColumns.Extended  
               });  
               break;  
             default:  
               throw new ArgumentOutOfRangeException();  
           }  
           if (listXml == null) throw new ArgumentNullException(nameof(listXml));  
           doc.LoadXml(listXml.ToString());  
           multipleListItems.Add(TransformObjectAndXml.Deserialize<ListItems>(doc));  
         }  
         return getFinalPublishedInfo.FilterIsPublishedItem(multipleListItems).SelectMany(publishedItem => publishedItem, (publishedItem, item) => new { publishedItem, item }).Select(@t => new { @t, publishInfo = Client.GetListPublishInfo(@t.item.ID) }).SelectMany(@t => getFinalPublishedInfo.ReturnFinalList(@t.publishInfo, @t.@t.item)).ToList();  
       }  
       catch (Exception ex)  
       {  
         throw new HttpResponseException(Request.CreateErrorResponse(HttpStatusCode.InternalServerError, ex.Message));  
       }  
     }  

Publish and UnPublish Items

The Publish and UnPublish method is the POST request method and deserialized JSON  into C# Model.

{"TcmIds":[{Id:"tcm:14-65-4",Target:"staging"},{Id:"tcm:14-77-64",Target:"staging"}]}


  #region Publishe the items  
     /// <summary>  
     /// Publishes the items.  
     /// </summary>  
     /// <param name="IDs">The i ds.</param>  
     /// <returns>System.Int32.</returns>  
     /// <exception cref="ArgumentNullException">result</exception>  
     [HttpPost, Route("PublishItems")]  
     public string PublishItems(PublishUnPublishInfoData IDs)  
     {  
       try  
       {  
         var pubInstruction = new PublishInstructionData()  
         {  
           ResolveInstruction = new ResolveInstructionData() { IncludeChildPublications = false },  
           RenderInstruction = new RenderInstructionData()  
         };  
         PublishTransactionData[] result = null;  
         var tfilter = new TargetTypesFilterData();  
         var allPublicationTargets = Client.GetSystemWideList(tfilter);  
         if (allPublicationTargets == null) throw new ArgumentNullException(nameof(allPublicationTargets));  
         foreach (var pubdata in IDs.IDs)  
         {  
           var target = allPublicationTargets.Where(x => x.Title == pubdata.Target).Select(x => x.Id).ToList();  
           if (target.Any())  
           {  
             result = Client.Publish(new[] { pubdata.Id }, pubInstruction, new[] { target[0] }, PublishPriority.Normal, null);  
             if (result == null) throw new ArgumentNullException(nameof(result));  
           }  
         }  
         return "Item send to Publish";  
       }  
       catch (Exception ex)  
       {  
         throw new HttpResponseException(Request.CreateErrorResponse(HttpStatusCode.InternalServerError, ex.Message));  
       }  
     }  
     #endregion  
     #region Unpublish the items  
     /// <summary>  
     /// Uns the publish items.  
     /// </summary>  
     /// <param name="IDs">The i ds.</param>  
     /// <returns>System.Object.</returns>  
     /// <exception cref="ArgumentNullException">result</exception>  
     /// <exception cref="HttpResponseException"></exception>  
     [HttpPost, Route("UnPublishItems")]  
     public string UnPublishItems(PublishUnPublishInfoData IDs)  
     {  
       try  
       {  
         var unPubInstruction = new UnPublishInstructionData()  
         {  
           ResolveInstruction = new ResolveInstructionData()  
           {  
             IncludeChildPublications = false,  
             Purpose = ResolvePurpose.UnPublish,  
           },  
           RollbackOnFailure = true  
         };  
         PublishTransactionData[] result = null;  
         var tfilter = new TargetTypesFilterData();  
         var allPublicationTargets = Client.GetSystemWideList(tfilter);  
         if (allPublicationTargets == null) throw new ArgumentNullException(nameof(allPublicationTargets));  
         foreach (var tcmID in IDs.IDs)  
         {  
           var target = allPublicationTargets.Where(x => x.Title == tcmID.Target).Select(x => x.Id).ToList();  
           if (target.Any())  
           {  
             result = Client.UnPublish(new[] { tcmID.Id }, unPubInstruction, new[] { target[0] }, PublishPriority.Normal, null);  
             if (result == null) throw new ArgumentNullException(nameof(result));  
           }  
         }  
         return "Items send for Unpublish";  
       }  
       catch (Exception ex)  
       {  
         throw new HttpResponseException(Request.CreateErrorResponse(HttpStatusCode.InternalServerError, ex.Message));  
       }  
     }  
     #endregion  

Summary Panel

The GetSummaryPanelData method is the POST request method and deserialized JSON in C# modal.

JSON format is {'IDs':['tcm:14-65-4']}


 #region Get GetSummaryPanelData  
     /// <summary>  
     /// Gets the analytic data.  
     /// </summary>  
     /// <returns>System.Object.</returns>  
     [HttpPost, Route("GetSummaryPanelData")]  
     public object GetSummaryPanelData(TcmIds tcmIDs)  
     {  
       try  
       {  
         GetPublishedInfo getFinalPublishedInfo = new GetPublishedInfo();  
         var multipleListItems = new List<ListItems>();  
         XmlDocument doc = new XmlDocument();  
         foreach (var tcmId in tcmIDs.IDs)  
         {  
           var listXml = Client.GetListXml(tcmId.ToString(), new RepositoryItemsFilterData  
           {  
             ItemTypes = new[] { ItemType.Component, ItemType.ComponentTemplate, ItemType.Category, ItemType.Page },  
             Recursive = true,  
             BaseColumns = ListBaseColumns.Extended  
           });  
           if (listXml == null) throw new ArgumentNullException(nameof(listXml));  
           doc.LoadXml(listXml.ToString());  
           multipleListItems.Add(TransformObjectAndXml.Deserialize<ListItems>(doc));  
         }  
         List<Item> finalList = new List<Item>();  
         foreach (var publishedItem in getFinalPublishedInfo.FilterIsPublishedItem(multipleListItems))  
           foreach (var item in publishedItem)  
           {  
             var publishInfo = Client.GetListPublishInfo(item.ID);  
             foreach (var item1 in getFinalPublishedInfo.ReturnFinalList(publishInfo, item)) finalList.Add(item1);  
           }  
         IEnumerable<Analytics> analytics = finalList.GroupBy(x => new { x.PublicationTarget, x.Type }).Select(g => new Analytics { Count = g.Count(), PublicationTarget = g.Key.PublicationTarget, ItemType = g.Key.Type, });  
         var tfilter = new TargetTypesFilterData();  
         List<ItemSummary> itemssummary = getFinalPublishedInfo.SummaryPanelData(analytics, Client.GetSystemWideList(tfilter));  
         return itemssummary;  
       }  
       catch (Exception ex)  
       {  
         throw new HttpResponseException(Request.CreateErrorResponse(HttpStatusCode.InternalServerError, ex.Message));  
       }  
     }  
     #endregion  

Get All Publication and Target Type

 #region Get list of all publications  
     /// <summary>  
     /// Gets the publication list.  
     /// </summary>  
     /// <returns>List&lt;Publications&gt;.</returns>  
     [HttpGet, Route("GetPublicationList")]  
     public List<Publications> GetPublicationList()  
     {  
       GetPublishedInfo getPublishedInfo = new GetPublishedInfo();  
       XmlDocument publicationList = new XmlDocument();  
       PublicationsFilterData filter = new PublicationsFilterData();  
       XElement publications = Client.GetSystemWideListXml(filter);  
       if (publications == null) throw new ArgumentNullException(nameof(publications));  
       List<Publications> publicationsList = getPublishedInfo.Publications(publicationList, publications);  
       return publicationsList;  
     }  
     #endregion  
     #region Get List of all publication targets  
     /// <summary>  
     /// Gets the publication target.  
     /// </summary>  
     /// <returns>System.Object.</returns>  
     [HttpGet, Route("GetPublicationTarget")]  
     public object GetPublicationTarget()  
     {  
       var filter = new TargetTypesFilterData();  
       var allPublicationTargets = Client.GetSystemWideList(filter);  
       if (allPublicationTargets == null) throw new ArgumentNullException(nameof(allPublicationTargets));  
       return allPublicationTargets;  
     }  
     #endregion  


You can download the code from the Github.

Happy Coding and Keep Sharing !!!

SDL Web Hackathon 2018 - Published Summary Plugin

Published Summary Alchemy-Plug In project has been conceptualized and initiated for SDL Tridion Developer Summit, Amsterdam Hackathon for the year 2018.

The entry for Hackathon has been entered with the team name - "CB Ke Cheete" and for the project "Published Summary" Alchemy plugin.

Team Members 
The team - "CB ke Cheete" - having meanings as "Cheetahs of CB", comprises of three young and dynamic Content Bloom professionals. The team has following members:
  • Pankaj Gaur - Director, Content Bloom | SDL Certified Dev and BA | SDL Tridion/Web MVP
  • Hem Kant - Consultant, Content Bloom | SDL Certified Dev and BA | SDL Web MVP
  • Priyank Gupta - Consultant, Content Bloom | SDL Certified Dev

This plugin is intended to do the following:
  1. Get all items within a publication, folder or structure group published to one or more Publishing Target Types.
    • Let's say if we select Publication then the response will be all Published  PagesComponents, and Categories in that publication.
    • If we select this plugin from Structure group, then we will have all the published pages in the structure group and same goes for Folder selection all Published ComponentTemplates and Components.
  2. Republish, Unpublish and open a specific item.
  3. Republish or Unpublish multiple items on their respective Publishing Target Types.
  4. Export in CSV.
  5. Filter based on Publishing Target Types, Item Type (Component, Pages etc.), and Published Date Range.
  6. Sorting based on Title, Published Date, Published By, Targets, and TCM URIs.
  7. Searching.
  8. Summary of published building blocks across all publishing target types.

The Published Summary Alchemy Plug-in can help in following scenarios:
  1. You want to export a list of all published items from Tridion for a specific website (or for a specific structure group/folder within a website) in CSV format.
  2. You want to see/export all published items from Tridion for a specific Publishing Target Type and compare among all publishing target types for a specific CMS instance.
  3. You need to know, what all need to be published from Tridion in order to make a specific website up and running similar to an existing website.
  4. You need to know a summary of "how many" specific items are published from Tridion to individual publishing target types.
  5. You need to know about "delta" of published items across publishing target types of a CMS instance.
  6. You need to sync your non-live websites with the live websites in terms of content managed from Tridion.
Published Summary

Happy Coding and Keep Sharing !!!

Tuesday 4 September 2018

Client Side Caching in SDL DXA using Redis

What is Redis?


Redis (Remote Dictionary Server)  is an in-memory data structure store, used as a database, cache and message broker. It supports data structures such as strings, hashes, lists, sets, sorted sets with range queries, bitmaps, hyperloglogs and geospatial indexes with radius queries.

Redis is good for cache, but it's much more than just a cache. It's high speed fully in-memory database.

Not just a cache:-
  • In memory key-value storage.
  • Support multiple datatypes (strings, hashes, lists, sets, sorted sets, bitmaps, and hyperloglogs).
  • It provides an ability to store cache data into physical storage (if needed).
  • Support the pub-sub model.
  • Redis cache provides replication for high availability (master/slave).

SDL DXA comes up with the pre-defined configuration of Redis for client-side caching to improve the performance of Web-application.

Pre-requisites:-
Installing the Redis
  • Download the Redis and extract the zip file in a directory at any location.e;g in c:\redis
    Redis
      Next is open the command prompt and run following command
  • redis-server.exe to start the Redis server
    Redis server
  • redis-cli.exe to start the command line interface. redis-cli is the Redis command line interface, a simple program that allows to send commands to Redis and read the replies sent by the server, directly from the terminal.
    Redis CLI

Next, is configure DXA to use Redis for client-side caching go to DXA web.config and navigate to <sdl.web.delivery>  node and there we already have Redis configuration setup we just need to update the cacheName. You set the policy of expiry as per the requirement.

Redis Configuration in DXA Web.config

Restart the IIS and spin the DXA Website, the site will trigger the page caching and it will add it to the Redis database.

To test the data is saved in Redis or not install Redis Desktop manager and refresh the page to load the data. In the below image you see data is cached in the Redis.

Redis Desktop Manager

Happy Coding and Keep Sharing!!!

Monday 3 September 2018

Installing SDL Content Delivery Microservices in Docker

In the last couple of blogs, we learned how to use Docker with SDL DXA Html-Theming and SDL DXA. Today we are going to setup Microservices in Docker. The microservices, also called Content Interaction Services, are the server-side components of Content Delivery. The Microservices is based on Java Spring-boot which uses embedded Tomcat to run the Services.

To learn more about SDL DXA, DXA Html-theming and SDL WEB with docker, please follow below links.
  1. SDL WEB, Docker and Cloud Containerization
  2. Run DXA in Docker
  3. DXA theming in Docker
After this, we can say that we managed to run SDL Content Delivery Environment in Docker.

I downloaded the latest CD HotFix from SDL FTP. In this blog, we are going to Install Content and Context Microservices in docker.

Steps:-
  1. Download the latest CD HotFixes.
  2. Create a new Folder and copy the Content standalone folder in it.
  3. Configure cd_Storage_conf.xml file.
  4. Copy License file in the config folder.
  5. Update Logback.xml
  6. Create Docker File in the root.
Docker File
1:  FROM java:8  
2:  COPY Contentstandalone /  
3:  RUN chmod +x /bin/start.sh  
4:  CMD bash -C '/bin/start.sh'  
5:  EXPOSE 8091  
Next, is we need to BUILD the Docker container.
 docker build -t content-service-staging .  
If everything goes well and it builds successfully next is RUN it.
 docker run -p 8091:8091 content-service-staging  

Below is the output of the above command.

Build Container 


Run the docker container 
Let's browse the Content service


Content Microservice running in Docker

SDL Content Microservice is up and running. Similarly, I followed the same steps in order to install the Context Microservice.

Context Microservice

Context Microservice is up and running in Docker

So, We've Dockerised SDL Content and Context Microservices, it was quick and simple most of the changes/configuration we did is the standard part of the installation of the SDL Microservices.

Happy Coding and Keep Sharing !!!!

Sunday 29 July 2018

Scaling SDL WEB 8.5 Installing CM and Publisher on Dedicated Machines

One of the biggest advantages of using SDL WEB (Tridion) is its scalability features. Last week, I was working on a task where I need to implement/Configure highly scalable SDL WEB 8.5 infrastructure.

Today, we are going to see one of them and that is "How to install CM and Publishers on Dedicated machines" to improve publishing efficiency.


Step I followed to configure CME and Publisher on a dedicated machine.

  1. Install all the core components on your content manager server
  2. Fill all the Database/ Website/ Topology related details.
  3. Once your setup is completed and you are able to browse CME go to windows service and disable the following services from content manager server. 
    1. Tridion Content Distributor Transport Service
    2. Tridion Content Manager Publisher Service
    3. This will stop the content manager server from doing the publishing
Set up Publisher servers
  1. Run the installer again on Publisher servers.
  2. Fill all the DB details and user accounts details.
  3. Transfer the cd_transport_conf.xml file from Content Manager Server to the same location on the new Publisher Servers.
  4. On Publisher servers we need to stop/disable the following services.
    1. Tridion Content Manager Workflow Agent Service
    2. Tridion Content Manager Service Host Service
    3. Tridion Content Manager Search Indexer
    4. Tridion Content Manager Batch Processor Service
  5. Restart the following services 
    1. Tridion Content Distributor Transport Service
    2. Tridion Content Manager Publisher Service
Now, new publisher servers are ready to publish and transport the package to the deployers. We can scale this further depending upon the requirement. 


Happy Coding and Keep Sharing !!! 


Saturday 28 July 2018

SDL Web, Docker and Cloud Containerization

What are containers


       Containers are a way to package software in a format that can run isolated on a shared operating system.
       A container wraps an application in a complete package that contains everything to run the application – code, libraries, dependencies, runtimes.
       A container image is a lightweight, stand-alone, executable package of a piece of software that includes everything needed to run it: code, runtime, system tools, system libraries, settings. Available for both Linux and Windows-based apps, the containerized software will always run the same, regardless of the environment
       Containers isolate software from its surroundings, for example, differences between development and staging environments and help reduce conflicts between teams running different software on the same infrastructure.

What is Docker


       Docker is a leading platform for Containerization of the application
       Docker allows you to package all pieces of your application into a single container so that your application will run same everywhere without worrying about the environment dependency and complexities.
       Docker is a tool that is designed to benefit both developers and system administrators, making it a part of many DevOps.
       For developers, it means that they can focus on writing code without worrying about the system that it will ultimately be running on.
       In a way, Docker is a bit like a virtual machine. But unlike a virtual machine, rather than creating a whole virtual operating system.
       It is a tool designed to make it easier to create, deploy, and run applications by using containers. Containers allow a developer to package up an application with all of the parts it needs, such as libraries and other dependencies, and ship it all out as one package.

Containers Vs Virtual Machine


       Containers are an abstraction at the app layer that packages code and dependencies together. 
       Containers take up less space than VMs
       Virtual machines (VMs) are an abstraction of physical hardware turning one server into many servers
       Each VM includes a full copy of an operating system. VMs can also be slow to boot


Docker Advantages


          Automation of repetitive and tedious deployment tasks.
          Faster onboarding of new resource.
          Faster shipment of new features and fixes without downtime.
          Easy and real-time scaling of application.
          Easy Distribution, Share, and Configuration of applications.
          High security out of the box.
          Improve efficiency of DevOps.
          Modernize traditional apps faster and without investing huge without going through complete SDLC.

Docker Disadvantages


          Better performance than Virtual Machines but slower than Bare-Metal.
          Isolation and security are lesser as compared to the Virtual Machines.
          Storing data such that it is available even after the container is shut down is quite complicated.
       Not all applications benefit from containers – Cannot be blindly adopted for each and every application.

 Comparison between AWS, Google, and Azure Cloud Containerization


AWS Cloud – The AWS Cloud provides Amazon EC2 Container Services (Amazon ECS) which support container application and so let you run your Docker containers on a managed cluster of Amazon EC2 instances.

Google Cloud – Google offers Google Container Engine which lets you run Docker containers on Google Cloud.

MS Azure – Microsoft also offers Azure container service to allow deployment, management, and execution of Container applications.
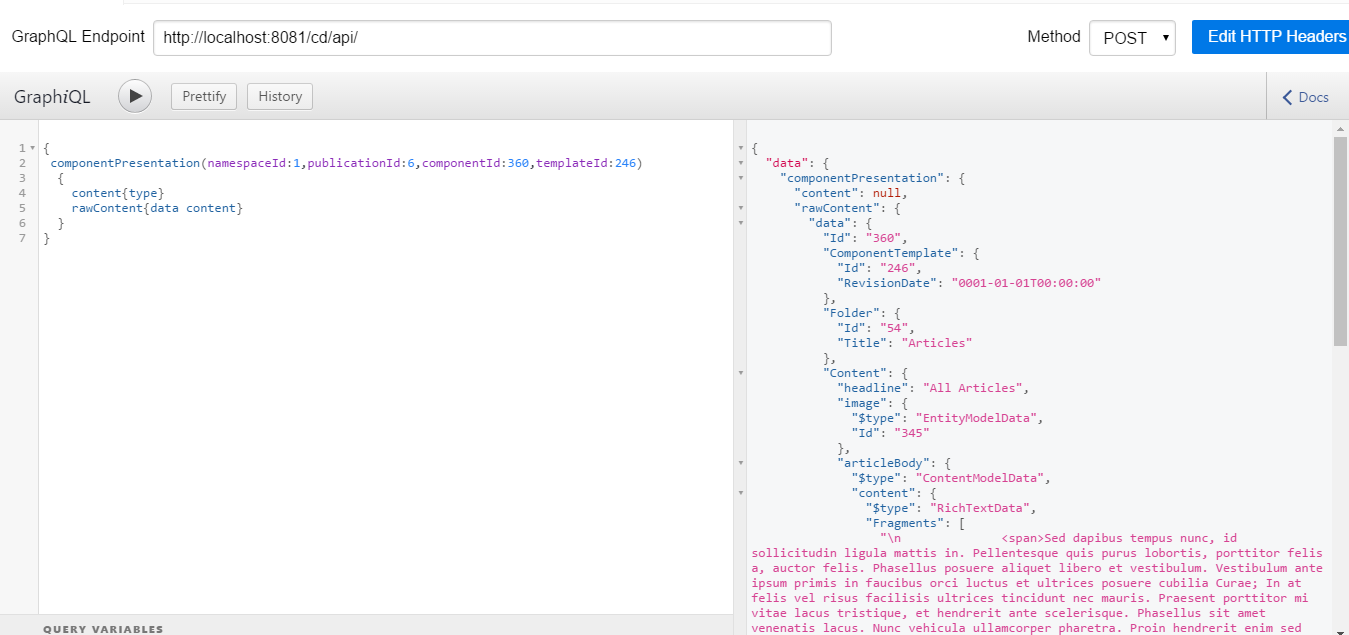
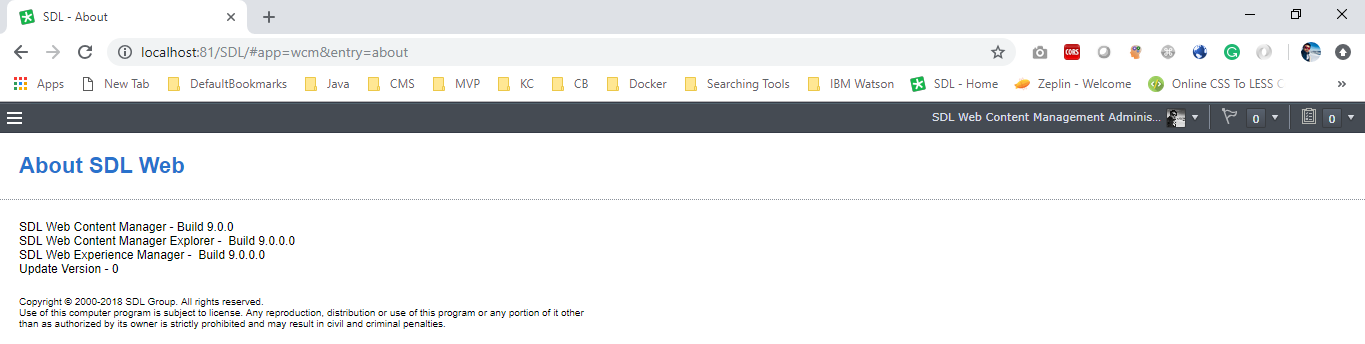
Docker and SDL WEB 

With the release of SDL Web, the Dockerization becomes quite easy

SDL Web is quite Docker friendly because of the following:
·         Micro-service based architecture.
·         Parameterized config files.
             ·       License-free web application.

SDL WEB – Advantages of using Docker

  •         Great time and effort saving for DevOps
  •         Complexities of SDL CD Deployment is encapsulated and allows the non-Tridion experts to do the deployment.
  •         Scaling of servers is quite easy.
  •         The overall cost of resources will be optimized as compared to Virtual Machines.
   Happy Coding and Keep Sharing !!!!

Saturday 14 July 2018

SDL WEB and TLS 1.2 or higher

Are you still using the SSL/early TLS protocols? 


Do you work with partners or customers who haven’t yet started the migration away from SSL/early TLS to a more secure encryption protocol? It's time to say goodbye to SSL/early TLS and reducing the risk of being breached.

On 30 June 2018?

30 June 2018 is the deadline for disabling SSL/early TLS and implementing a more secure encryption protocol – TLS 1.1 or higher (TLS v1.2 is strongly encouraged) in order to meet the PCI Data Security Standard (PCI DSS).

What is TLS?

TLS stands for Transport Layer Security and is the successor to SSL (Secure Sockets Layer). However, both these terms are commonly thrown around a lot online and you might see them both referred to as simply SSL.  TLS provides secure communication between web browsers and servers. The connection itself is secure because symmetric cryptography is used to encrypt the data transmitted. The keys are uniquely generated for each connection and are based on a shared secret negotiated at the beginning of the session, also known as a TLS handshake. Many IP-based protocols, such as HTTPS, SMTP, POP3, FTP support TLS to encrypt data.

In my last project, we faced this issue where client's security and infra team enabled TLS 1.3 on servers and while implementing SDL WEB 8.5 we start getting this issue.

Issue because of TLS 1.3

After investigating and consulting it with SDL we've found the solution for this, SDL WEB 8.5 supports till 1.2 and for that, we need to make some adjustment in the registry. Below are the registry entry details that fixed the algorithm and TLS issue for us.

TLS 1.0
TLS 1.0 Client

TLS 1.1 Client

TLS 1.2 client

[HKEY_LOCAL_MACHINE\SOFTWARE\Microsoft\.NETFramework\v4.0.30319]"SchUseStrongCrypto"=dword:00000001
New Entry Required  

[HKEY_LOCAL_MACHINE\SOFTWARE\Wow6432Node\Microsoft\.NETFramework\v4.0.30319]"SchUseStrongCrypto"=dword:00000001
New Entry Required

Happy Coding and Keep Sharing !!!